Introduction
I’ve always wanted a pullup bar, but I didn’t want to drill any holes in any walls or ceilings. I’ve seen some pieces of equipment that fit in doorways or closets, but I didn’t really trust that it wouldn’t ruin the wood or frame. I finally decided to just go make my own, and by utilizing the I-beam in my basement, I was able to create a pullup bar that did not require any drilling.
What You’ll Need
I went to Lowes’ to buy all the parts for this. I used 1 1/4″ galvanized steel pipes, and the total was about $60. You can probably get 1″ pipes and save a little money. Here are the parts that I used:
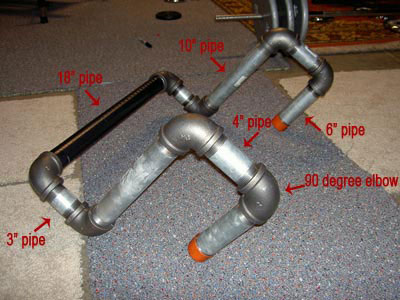
- 8 x 90 degree elbow ($20)
- 1 x 18″ pipe ($7)
- 2 x 10″ pipe ($13)
- 2 x 6″ pipe ($7)
- 2 x 4″ pipe ($7) — the depth of the I-beam
- 2 x 3″ pipe ($5)
- Electrical tape
- A pipe wrench or something for leverage
Instructions
It should be fairly self explanatory of how to put this together. Nevertheless, here’s a few tips to help you put it together:
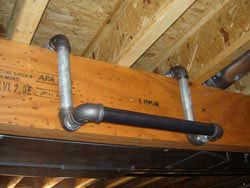
- The 18″ pipe is the portion that you’ll actually grab onto — wrap this in electrical tape last, once everything is in place
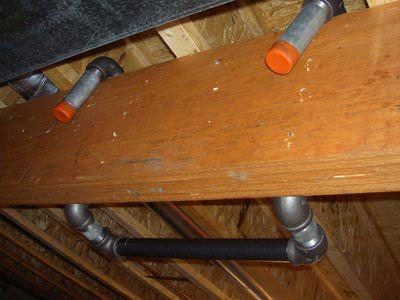
- The 10″ pipe provides the elevation to get over the I-beam
- The 6″ pipe provides the backing/support on the opposite side of where the pullup bar is
- The 4″ pipe is the portion of the pipe that is on top of the I-beam
- The 3″ pipe extends the pullup bar away from the I-beam
I will tell you right now — you’ll get a really, really good workout getting this thing together. The pipes fit together easily, but it’s difficult to tighten them. You’ll need to use a lot of leverage to get the tight…I would recommend using a wrench or smaller pipe to get better leverage. Be careful not to grab the threading on the pipe — it will cut you.
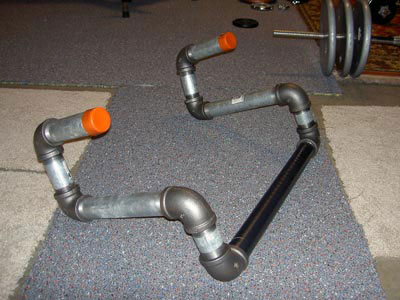
Because I am not going to take my pullup bar to show you how it works, below is an image that should help you to assemble your own pullup bar
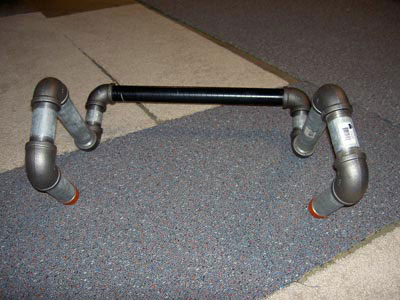
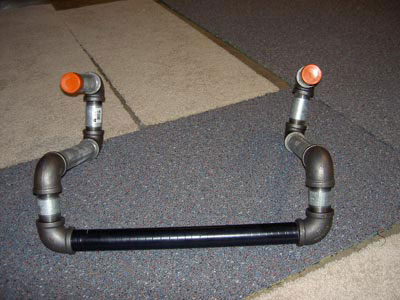
Additional Views
If you’d like to get a better view on how the pullup bar works, look at the images below